Model a Seamless NURBS Human Character
(MAYA 3d Tutorial Level 3)
Use "Complex tools" to model a Human Character
Level Advanced
| SETUP THE CHARACTER: |
|
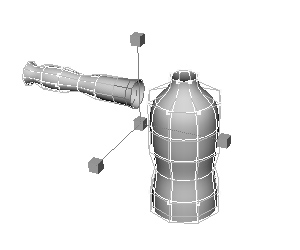
1- Start with primitives: 1 sphere for the head, cylinders for arms, legs and torso.
2- Shape primitives into more sophisticated models by inserting isoparms, pushing and pulling CVs, scaling and translating Hulls.
3- Place models in position to connect them together.
|
 |
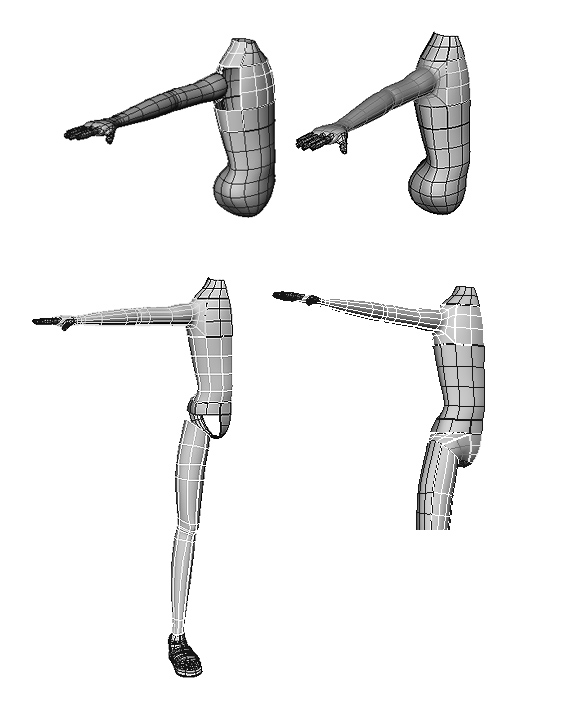
| CREATE A SEAMLESS CHARACTER: |
|
1- Detach Surfaces and prepare for later Stitch
2- Rebuild Surfaces: Always use 0 to # of spans (before attach, fillet, or stitch)
3- Freeform Fillet between surfaces.
4- Rebuild Fillet (Fillet becomes Chord Length, you need to rebuild to 0 to # of spans)
5- Delete History, to clean your surfaces.
6- Global Stitch (to align Isoparms) settings on : -closest knot- equal parameters- normals-
7- Attach second surfaces, Attach using isoparms :
(to hide seams use blend/ to keep corners, use : connect/ multi knot )
8- Place seams where we can't notice it much .
Use this technique to connect eyes, ears, fingers, legs, arms or even nose. |
 |
| SETUP CHARACTER FOR ANIMATION: |
|
1- Use wrap deformer (creates a low resolution polygon version of the model)
2- Connect NURBS model to polygonal model (quads/ tessellation: general/ per span # of isoparm/ 1 to 1)
3- Have all Normals face the same direction
4- Edit polygons, Combine (merge, saw multiple edge tools)
5- Simplify model as much as possible.
6- Use low resolution polygonal model to setup the Skeleton. |
|
|
